return to
Tutorials Index
return to
Software Tutorials Intro
Download:
Bernina Artista v3.1
(.pdf 1500k)
Embird Plus v7.0
(.pdf 148k)
Janome Digitizer 10000 v1.2d
(.pdf 388k)
PE Design v5.0
(.pdf 1.04MB)
Singer Professional Sew-Ware v1.1
(.pdf 784k)
Singer Professional Sew-Ware v2.00
(.pdf 428k)
Viking Customizing Plus VIPv6.0
(.pdf 192k)
To Download
[right click (PC) or control click (Mac) choose "Save Link Target As" or "Download Link to Disk".
![]()
Software Tutorials - Sample
Program Title: Embird Plus Version: 7.0
General Overview
For this tutorial we are making a three-letter monogram using the Empire Monogram Set. To create this monogram (ABC) the first name initial (A) goes on the left, the last name initial (B) goes in the center and is larger, and the middle name initial (C) goes on the right.
Our filenames have a consistent naming structure. Each Monogram Set style has a filename beginning with either A or AL, followed by a series of numbers, and ending in a letter of the alphabet. Many styles have two sizes for each letter, differentiated as 2A for the larger size letter A, and A for the smaller one. The same sequence is used for B, C, D, etc.
The Empire Monogram Set, which we are featuring here, has a separate file for the left (AL1201LA), middle (AL1201MA), and right (AL1201RA) versions.
Software Overview
This software program is divided into two portions: Embird Plus Manager, which runs first, and Embird Plus Editor.
Embird Plus Manager shows a screen divided into three sections: Left Panel, Middle Panel, and Right panel. Each of the panels has a separate drop-down menu in the Taskbar at the top of the screen.
The left-side panel is a menu for finding files on floppy disks. The middle panel is the design display area. The right panel has a drop-down Drive menu at top of the screen, a Folder menu below that, and a larger Files menu at the bottom.
If a design is opened on this screen, you have the option to change the design colors, print an image of the design, etc.
Since this tutorial describes combining several letter files to create a monogram, you can bypass this screen. (NOTE: This screen is the gateway to Embird Plus Editoróthe Editor section of the program cannot be accessed directly without first opening the Manager section of the program.)
Creating a Monogram Step-by-step
tep 1. Open Embird Plus Manager
Open the program by going to the Start button, then to Programs, and scrolling down to the listing for Embird Plus. Double click on the hummingbird icon with your left mouse button. (NOTE: if you created a desktop icon when you installed the program you can double click on the desktop icon.; see figure1)
Click to see larger image
Step 2. Open Embird Plus Editor
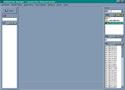
From the main Menu screen (Embird Plus Manager), go to the Taskbar at the top of the screen, and click on Editor with your left mouse button. This will launch the Embird Plus Manager portion of the program (see figure 2).
Notice that the screen shows a Taskbar at the top of the screen, and a second Taskbar running down the left side of the screen. Be sure that the button representing the image of the Cursor at the top of the left Taskbar is highlighted.

Click to see larger image
Step 3. Set Hoop Size
If this is the first time you have used this program, you should begin by selecting the correct hoop size for your machine. From the Taskbar, choose Options, then Hoop Size.
A screen called Change Hoop Size appears, with a list of most popular home embroidery machine brands and corresponding hoop options. Click the button next to your hoop size. It you do not see your hoop identified, there are drop-down menu options for popular Round and Rectangular hoops, and a Custom option for entering specific dimensions in millimeters.
Once you are happy with the selected hoop size, click on OK. (NOTE: once you have chosen a hoop size and saved it, that size will remain as your default hoop size each time the program is started. You can change the size by returning to the Options menu and selecting a different hoop size.)
Step 4. Open the First Monogram Letter
From the Taskbar, choose File. From the drop-down menu, choose Open. An Open Files screen will appear. The left side shows Drives and subfolders, the right side shows Files. Navigate on the left side to reach the area of your computer where the individual letter designs are stored, then highlight the first monogram letter (the file name for left side A is al1201LA), then click the OK button.
The letter chosen will appear in the center of the screen. The grid shown on the screen will be calibrated to the hoop size previously set. The image of the letter will first appear with a box around it. There are small black "handles" on each corner, and midway along each side of the box. These handles allow the design to be stretched vertically and horizontally.
Move the image to the left side of the grid. Locate your cursor in the center of the box around the image. You will see a four-direction arrow. Hold down the left mouse button, and the image can be shifted to the side without distorting or changing the design. Release the left mouse button when you are satisfied with the placement.
(NOTE: If you choose the wrong file by mistake, you can delete it by going to Edit in the Taskbar, then choosing Delete. Alternately, hold down the Shift key and press the Delete key on your keyboard. The image of the design you want to delete must have a box around it in order to delete it.)
(HINT: The new combination that you are creating will need to be saved with a new filename, to avoid overwriting the original file. It would be a good idea to save to a new filename after importing the first letter.)
Step 5. Add the Second Monogram Letter
Add a second letter to the first by going to the upper Taskbar. Choose File, then Merge. The Merge Files screen will appear, allowing you to choose a second design without erasing the image of the first (the filename for the middle B is al1201MB.) The second letter will now appear in the center of the screen, with a box around it . This letter may be shifted without moving the first.
Step 6. Add the Third Monogram Letter
Add a third letter using the same method (the filename for the right side C is al1201RC.) This letter will appear to be overlapping the letter in the center. The last file merged will have a box around it, and can be shifted to the right by holding down the left mouse button with the cursor over the center of the letter.
Step 7. Adjust the Spacing
Each letter is a separate object until the new combination is saved. Placing the cursor over each letter and clicking the left mouse button will activate that object by showing a box around it, allowing it to be moved by holding down the left mouse button and repositioning the image.
Step 8. Save the Combination
When you are happy with the spacing and position of the letters that make up the new monogram, save the combination under a new filename.
Go to File, then to Save As (NOTE: If you choose Save, or click on the icon of a diskette in the upper Taskbar, the new combination will overwrite the first design chosen, so BE SURE TO CHOOSE SAVE AS).
A File Conversion screen will appear, listing all of the supported embroidery file formats. Click the button next to the appropriate file, then click OK.
A new screen called Save As will appear. Browse to the location on your computer where you want to store the new design, using the Save In drop-down menu, or the Up One Level folder icon in the taskbar, which appears as a file folder image with an angled arrow.
Type a new filename in the Filename box, then click on Save.
The design is now saved. If you want to return to the Embird Plus Manager screen, or close the program, click on the X in the upper right corner of the screen. The Embird Plus Editor screen will close, and the Embird Plus Manager screen will open.
If you want to exit the program, click on the X in the upper right corner.
Please see the list of Options below for other Embird features that are frequently used with our Monogram Sets.
Options
(These features are used within Embird Plus Editor)
Changing Thread Colors
On the right side of the screen there is a small thumbnail image of the design, and to the right a small box showing each thread color. You can change these colors by clicking on the color with your right mouse button, which will open a new screen.
If you choose Change Color, a screen will open with a graphic for choosing a color.If you chose Choose Color From Catalogue, a screen will open with a catalogue of colors associated with different thread numbers. There is a separate color chart for each supported thread manufacturer.
Choosing a different thread color for each letter of the monogram combination will have the effect of introducing a color change recognized by the machine, so you can use this method for creating a multi-colored monogram.
(NOTE: Once the combination is saved as a new file, the software will combine the individual parts into one design and you will only be able to change the color of the entire combination. If you want to keep the individual letters as different colors, be sure to change the colors before saving the new design combination.)
Resizing Designs
The individual parts of the monogram can be resized one-by-one, but we have found that it is a much simpler process to resize the entire new monogram combination once it has been created and saved under a new filename.
To resize the monogram, stretched wider or taller:
Click on the "handle" at the midpoint of the vertical sides to create a two-direction arrow. Drag away from the center to widen the design, toward the center to narrow the design. Clicking on the handle at the midpoint of the horizontal sides will allow distortion on the opposite axis.
To resize the monogram without distortion:
The box surrounding the design has a "handle" at each corner. Clicking on one of these handles creates a two-direction diagonal arrow. Dragging the arrow outward enlarges the box around the design and the image of the design, and makes the design larger. Dragging the arrow inward has the opposite effect.
The density and the number of stitches in the design will be automatically recalculated as the size is changed.
Resizing of designs works effectively within a reasonable range. Without any manual density adjustment, we were able to enlarge the sample mongram design by 60%, and reduce it by 40% without any problem.
Sewing a sample of a resized design is essential to insure that the screen accurately represents the actual results.
Designs that are reduced too much may have too many stitches, and not sew well.
Enlarging designs with satin stitches may produce gaps - 12mm is the longest effective stitch length for a machine satin stitch. Satin or Column stitch can be converted to Fill stitch in Embird Editor by going to Options, then to Stitch Density, and selecting the option called Convert Column to Fill if Stitch is Longer than ( mm). You can set the maximum length - the default is 9mm. Making this change will also change the look of the monogram.
Changing Design Density
If you do not want to rely on the preset density factors, you can adjust them by going to Options on the Taskbar, then to Stitch Density. Column Stitch and Fill Stitch density can be set independently. (NOTE: the numeric settings are the inverse of their effect - a lower number will produce a higher density; a higher number will produce a lower density)
By removing the checkmark next to Adjust Stitch Density When Resizing, the stitch processor is turned off, so that stitches are moved closer together or farther apart as the design is resized. This can sometimes be useful for creating a thinner or a fuller effect.
Manually changing the density settings may create surprising results. Sewing a sample is essential if these factors are manually set.
To learn more about other features in Embird, please consult the program’s Help files.
For more information on Embird, please visit the company's website at http://www.embird.com
Richards Jarden, a former associate professor of fine arts, is the president of embroideryarts (a division of Intarsia Arts), and has been a digitizer since 1993. He has a particular interest in lettering and monograms, and has written articles on that subject for embroidery magazines. For more information, please visit the company's website at https://embroideryarts.com.
 |  |  |  |